


Finding 404 errors on your website using Google Analytics should be easy, but isn’t. In this article, you'll find a step-by-step guide for creating a 404 error report in Google Analytics that you can use to find broken links.
I’ll also tell you how to set up alerts that will notify you in case new errors appear.
How to Quickly Find 404 Errors in Google Analytics
Based on the page title
Probably the easiest way how to identify 404 errors in Google Analytics is using your Page Title.
In most cases, 404 pages have in their page title something as “Page Not Found”:
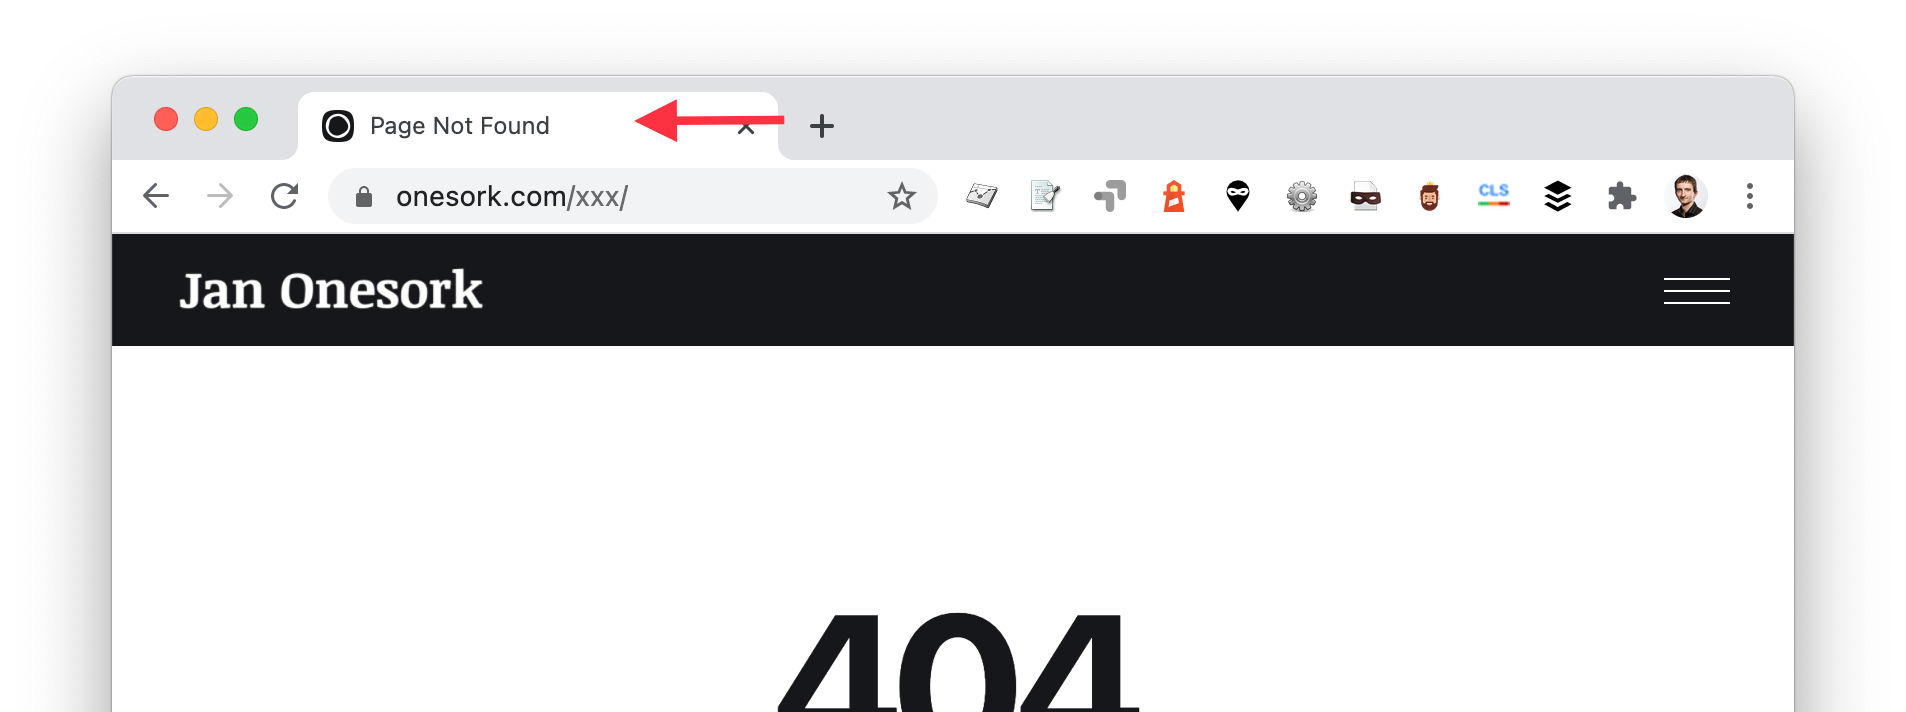
Check your website to see if it uses some similar title that you could use to identify 404s.
It’s easy to find 404 pages that way:
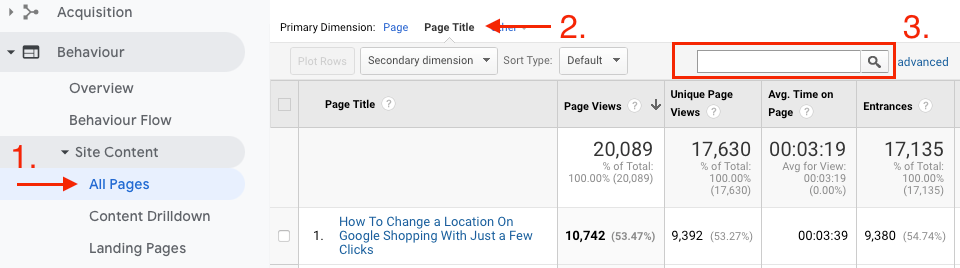
- In your Google Analytics, navigate to ”Behaviour -> Site Content -> All Pages”.
- Switch the Primary Dimension to “Page Title”
- Use the search box to find Page Title that your 404 pages have (usually something as “Page not Found” or “404”)
Once you have that, simply click on the 404 page title:
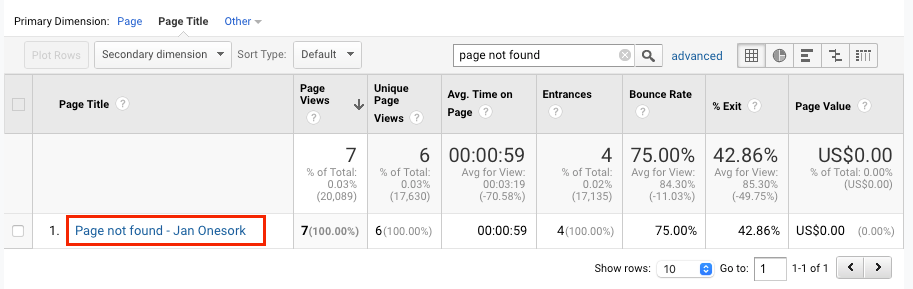
And voilà, here is the Google Analytics 404 report:
You can sort pages by the number of page views to see the most frequently appearing errors.
Pro tip:
Do you want to know which pages link to these broken URLs so you could actually fix these broken links?
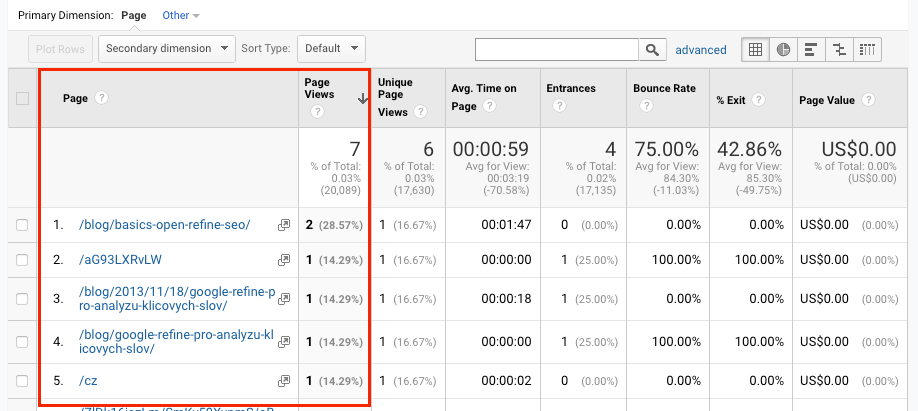
Once you get to the Google Analytics 404 report, simply add a new secondary dimension - “Previous Page Path”.
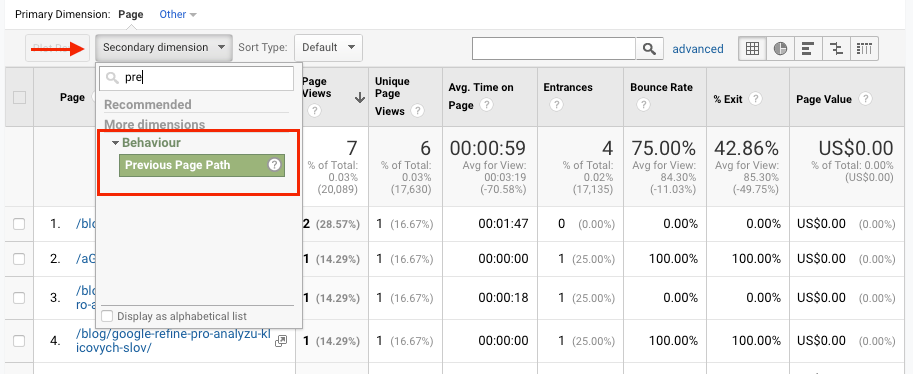
This will reveal which internal pages led people to these 404 errors. These pages most likely contain broken links and you should fix them.
If it says (entrance), it’s probably a link from another website - you can fix these by adding a redirect to an alternative page.
Based on page URL
Some websites are set up a bit differently - in case of a 404 error, they redirect or rewrite the URL. Even though this is not the right approach, it’s quite common for some WordPress plugins.
If that is your case, you need to go to “Behaviour -> Site Content -> All Pages” in Google Analytics and type “404” or some similar identifier in the search box:

You should be able to extract the 404 errors from there.
Based on a custom event
None of the above works for your website? You’ll probably need to create a custom event to track 404 errors.
All you need to do is place this JavaScript code into the body of your 404 page template:
<script>
    ga('send', {
      hitType: 'event',
      eventCategory: '404 Error,
      eventAction: window.location.href,
      eventLabel: document.referrer
 	 });
</script>
Once you do that, you’ll be able to see 404 errors report in Google Analytics in “Behaviour -> Events -> Top Events”.
The biggest downside of this approach is that you’ll need to be able to edit your 404 page template.
Also, data will not become available right away. It’ll start recording once you add the tracking code so you’ll need to wait some time to see results.
Here you can find more information on how to set up custom events.
How to Set Up Alerts for 404 Error Increase
You can use the steps above to create a report of the existing 404 errors that users run into.
But even better is to have an alert set up that will notify you once there are new errors on your site so you could fix them ASAP.
It’s easy to set up as well - you need to follow these steps:
#1 Create a segment for “404 Page Visits”
In your Google Analytics interface click on “+Add Segment”:

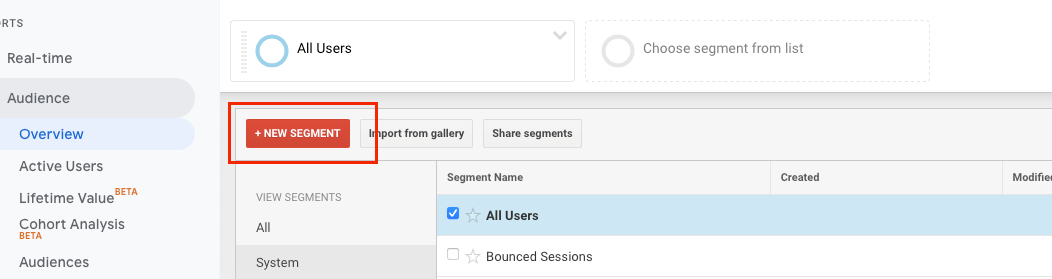
The list of all segments will pop up. Click on “+NEW SEGMENT”:
Here you need to name your segment (1), and then go to “Conditions” (2), and set up a condition that will match your 404 pages (3). It’ll be very similar to what we did before - you can for example use Page Title as the filter and type in the title of your 404 pages.
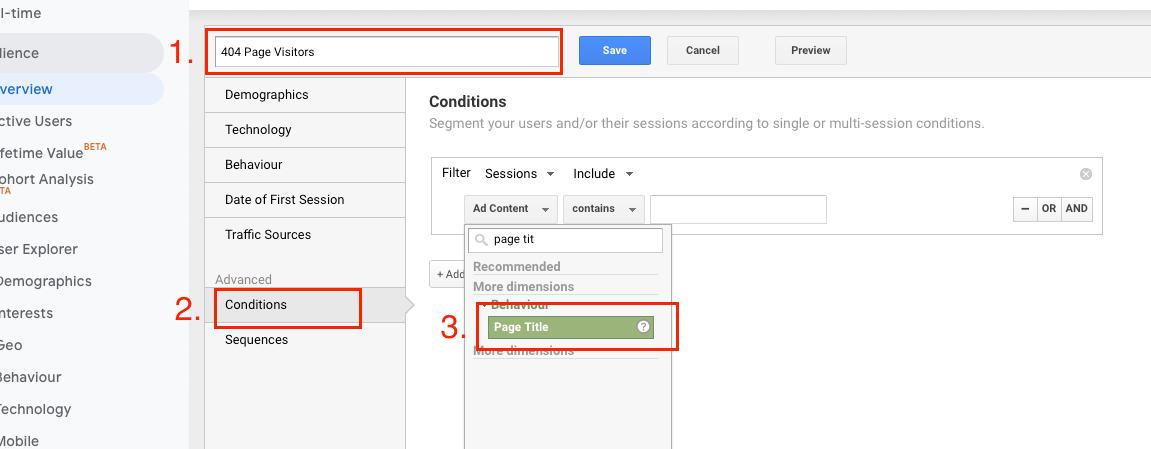
Once you have that, hit “Save”.
#2 Create a new notification for 404 errors
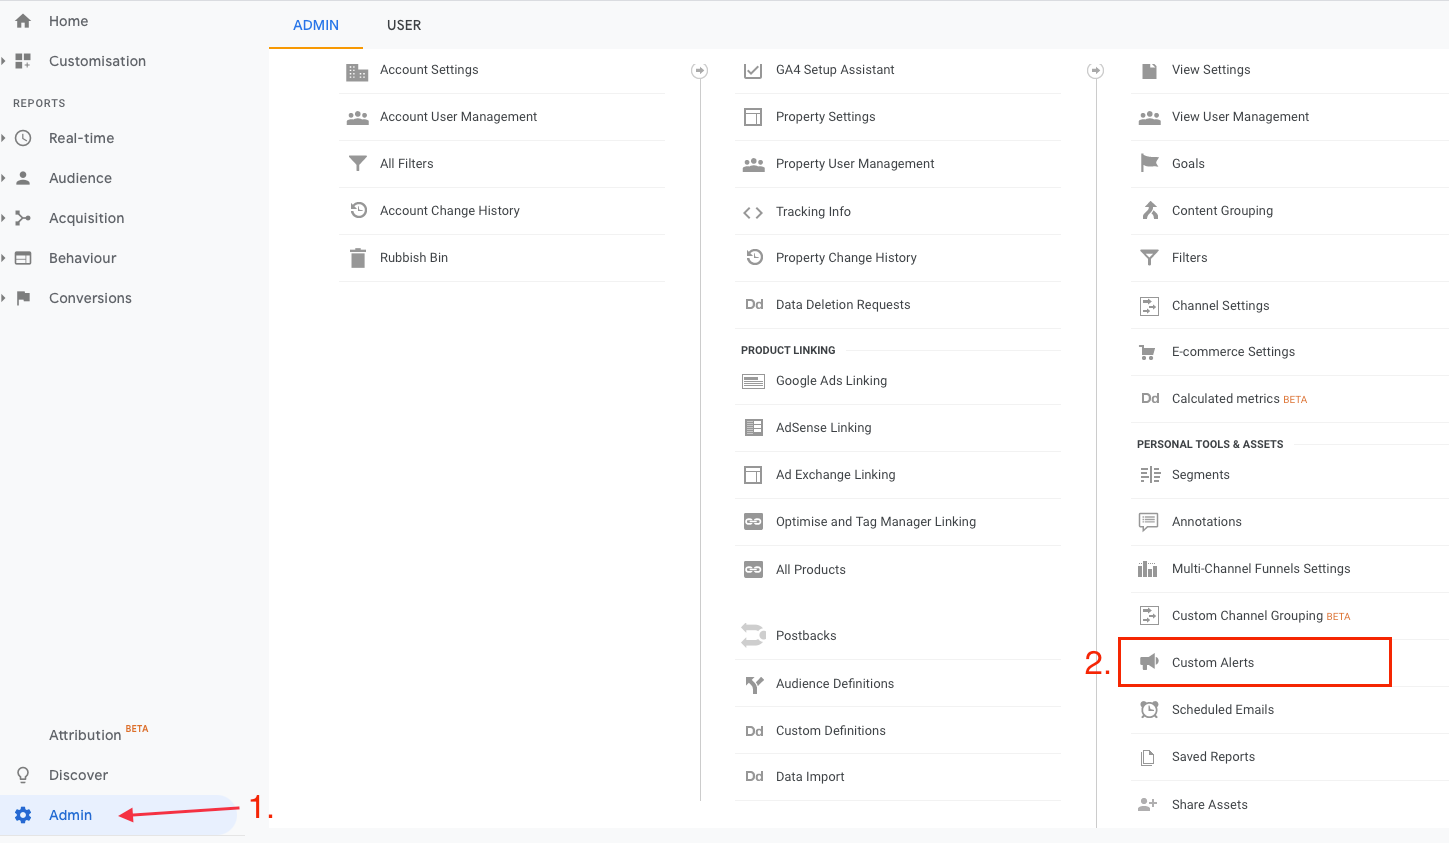
Now you need to head over to the admin panel and go to “Custom Alerts” in the 3rd column.
There you need to click on “+New Alert”. On the next screen, the most important part is to choose the segment you created in the “This applies to” field. Apart from that, you can configure the alert to your liking. Recommended configuration is on the screenshot below:
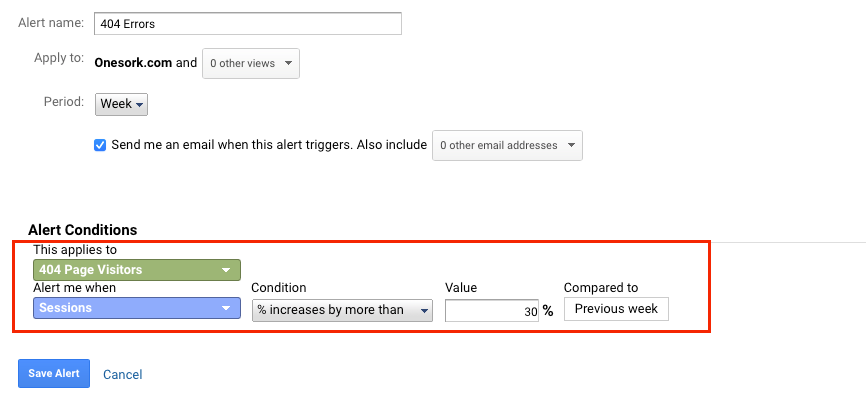
I usually recommend starting with a more sensitive threshold and adjusting later in case you get too many notifications.
How to Check 404 Errors in Google Analytics 4
All the steps apply to you if you use the older Google Analytics (Universal). But recently, Google started pushing Google Analytics 4 (previously called App+Web) on new accounts.
So if your Google Analytics interface looks completely different, you probably use Google Analytics 4 without even knowing about that 🙂
Don’t worry, it’s not that different and uses the same principles:
- You need to navigate to “Analysis -> Exploration”
- You need to make sure you have “Page Title” and “Page path + query string” in Dimensions. You also need to have “Active users” in Metrics
- You need to drag and drop “Page path + query string” to Rows
- And drag “Active users” to Values
- The most important part is the filter - you’ll use the same rule as we did with GA Universal - Page title needs to contain your unique string.
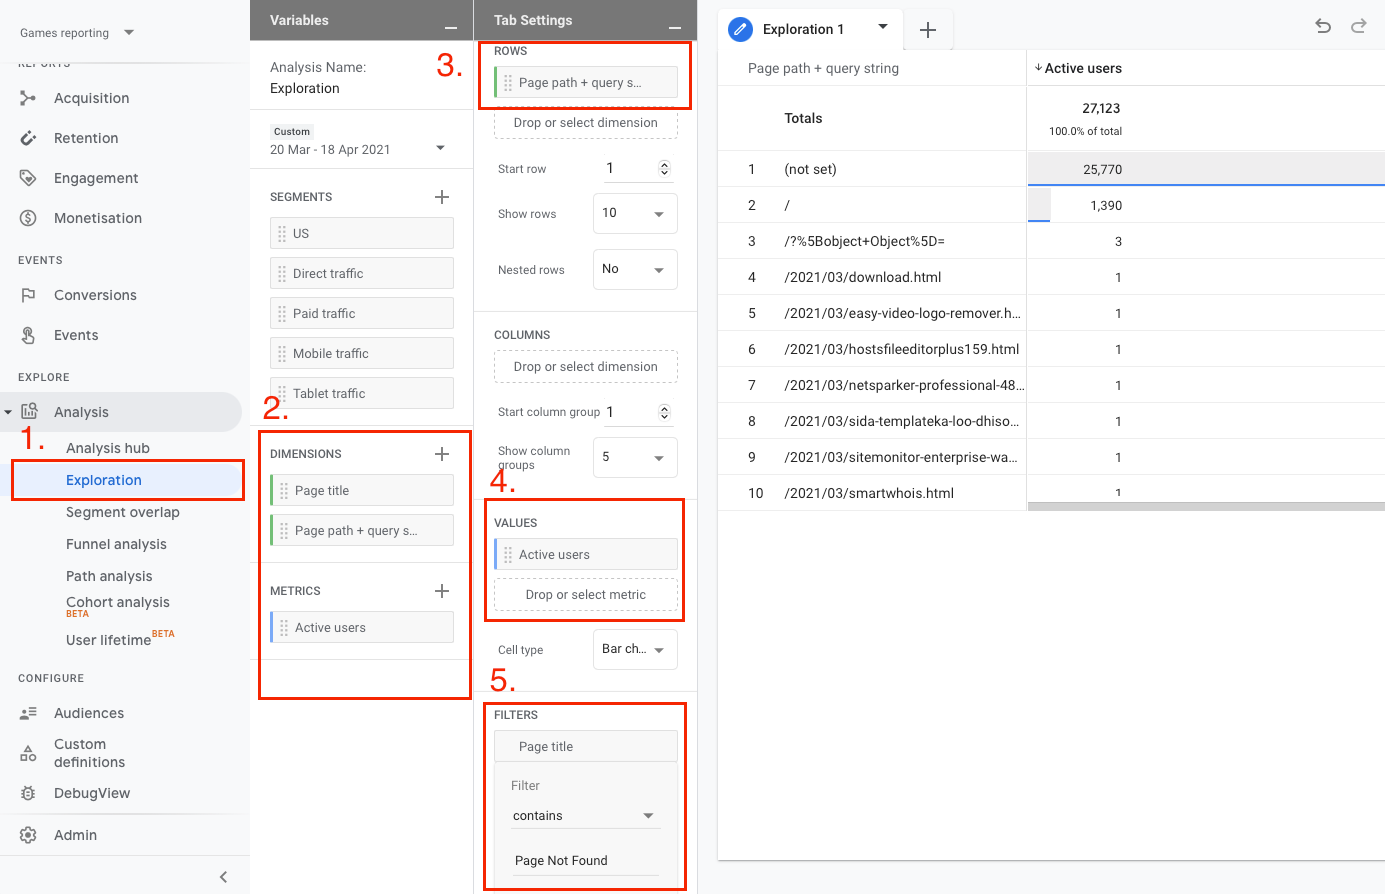
Once you hit Apply, it’ll create that 404 pages report for you.
How to Track 500 Errors in Google Analytics
“404: Page Not Found” is not the only error you should care about. There is also “500: Internal Server Error“ and other 5XX errors that are harder to pinpoint but could become an even bigger issue than regular 404s.
Server Errors are much more infrequent and because of that many websites have them without even knowing.
But there is a simple fix - use a custom 500 page that will contain your Google Analytics tracking code.
Many hostings let you customize your 500 error page - if it’s running Apache, it’s usually done by editing the .htaccess file:
ErrorDocument 500 /your-custom-500-error-page.html
Check with your hosting provider to see how to do that in your case.
Once you do that, you’ll be able to apply the same methods for 500s as we did for 404s.
In case you want to go further with you Google Analytics setup, check out my other article on the basic web analytics setup after a launch of a new site.
Member discussion